Starting the Van
- The alarm immobiliser will disable the ignition about 20 seconds after unlocking. If you try to start a van and it acts completely “dead”, try removing the key from the ignition, unlocking the van using the remote (or the unlock button on the key), and then immediately try starting the van again.
- GREY VAN – starts up as you would most cars.
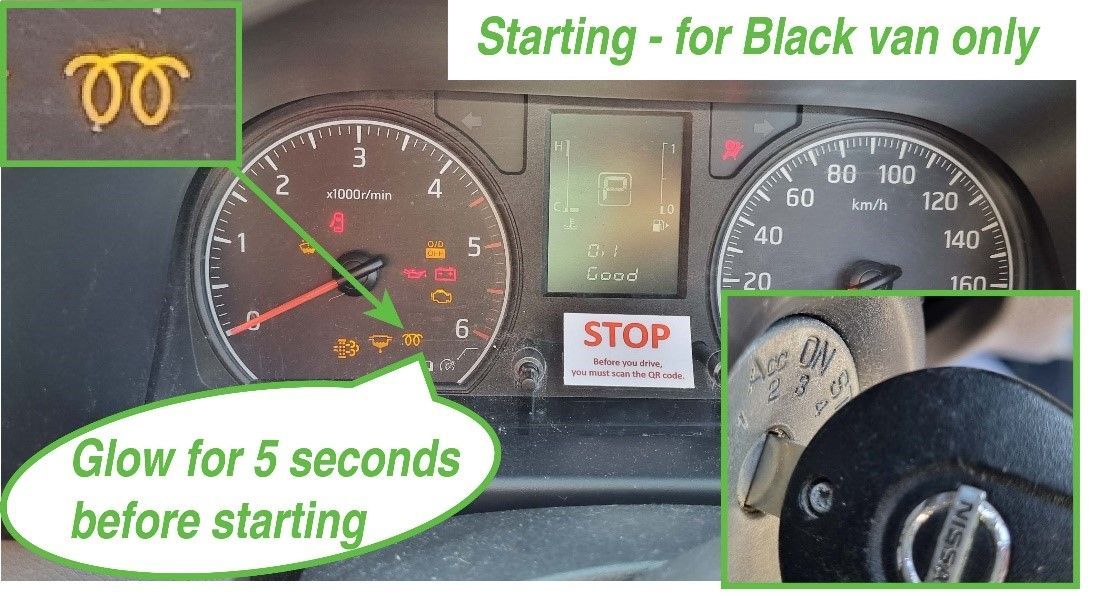
- BLACK VAN – is more like a diesel truck engine. You must ‘GLOW’ the engine before starting it. When starting, first turn the key to the #3 “on” position but DO NOT turn the key farther yet. When in the “on” position lots of lights will appear on the dashboard. The Glow Coil icon will stay on for about 5 seconds and then turn off. After the Glow Coil icon turns off you can then turn the key the rest of the way to position #4 to start. See picture below.
Checking Oil & Water
- If you are taking the van on a long drive and/or suspect the van may be overheating, you will need to check the oil and water.
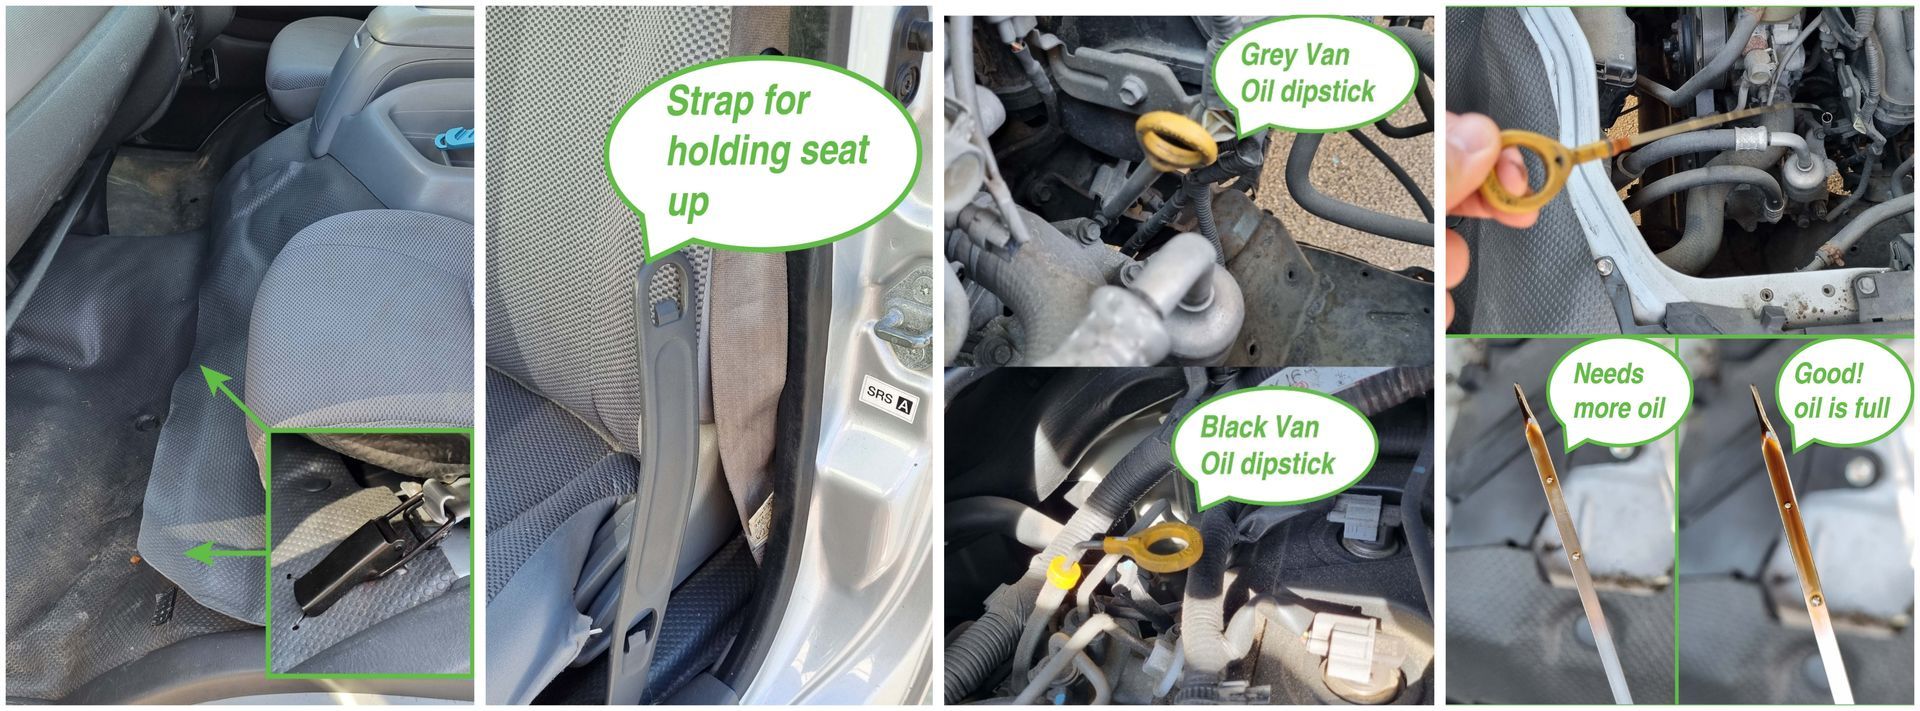
- First get a rag or paper towel. Open the engine bay by unclipping the metal clips below the front passenger seat
- There is a plastic strip to use to hold the seat up
- Remove the oil dipstick [PHOTO], wipe it clean with the rag, reinsert the dipstick fully, then remove the dipstick again and check the level. The oil level should be at or near the full level. If it is near the low level or below then additional oil must be added. Reinsert dipstick after checking.
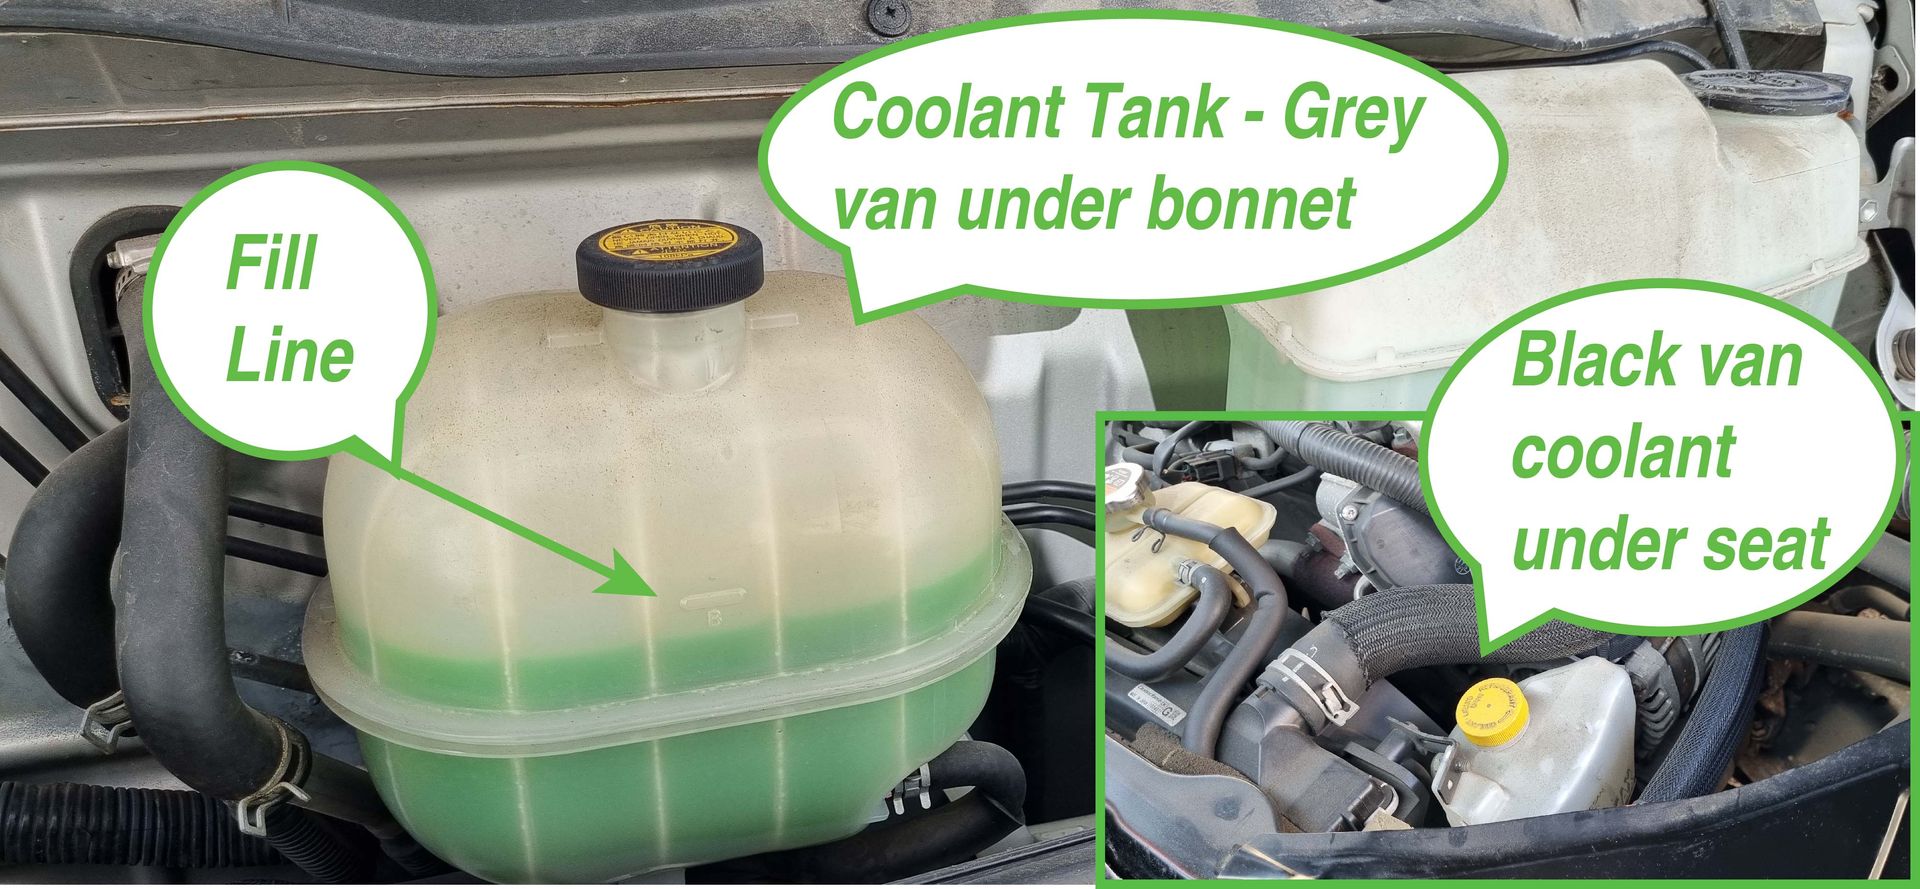
- Be very cautious if checking the coolant while the engine is hot. Do NOT open the water if uncertain as steam may explode and cause burns.
- If coolant is low, it will need to be topped up with water. Contact management and/or take to local mechanic for check immediately if it requires more than 1L top-up
Tyre Inflation
- Tyres should be inflated to 50 psi. If you notice that any tyres appear flat at all, check the pressure and inflate if needed. If you are on a long trip please check tyres before leaving.
Where the spare tyre is
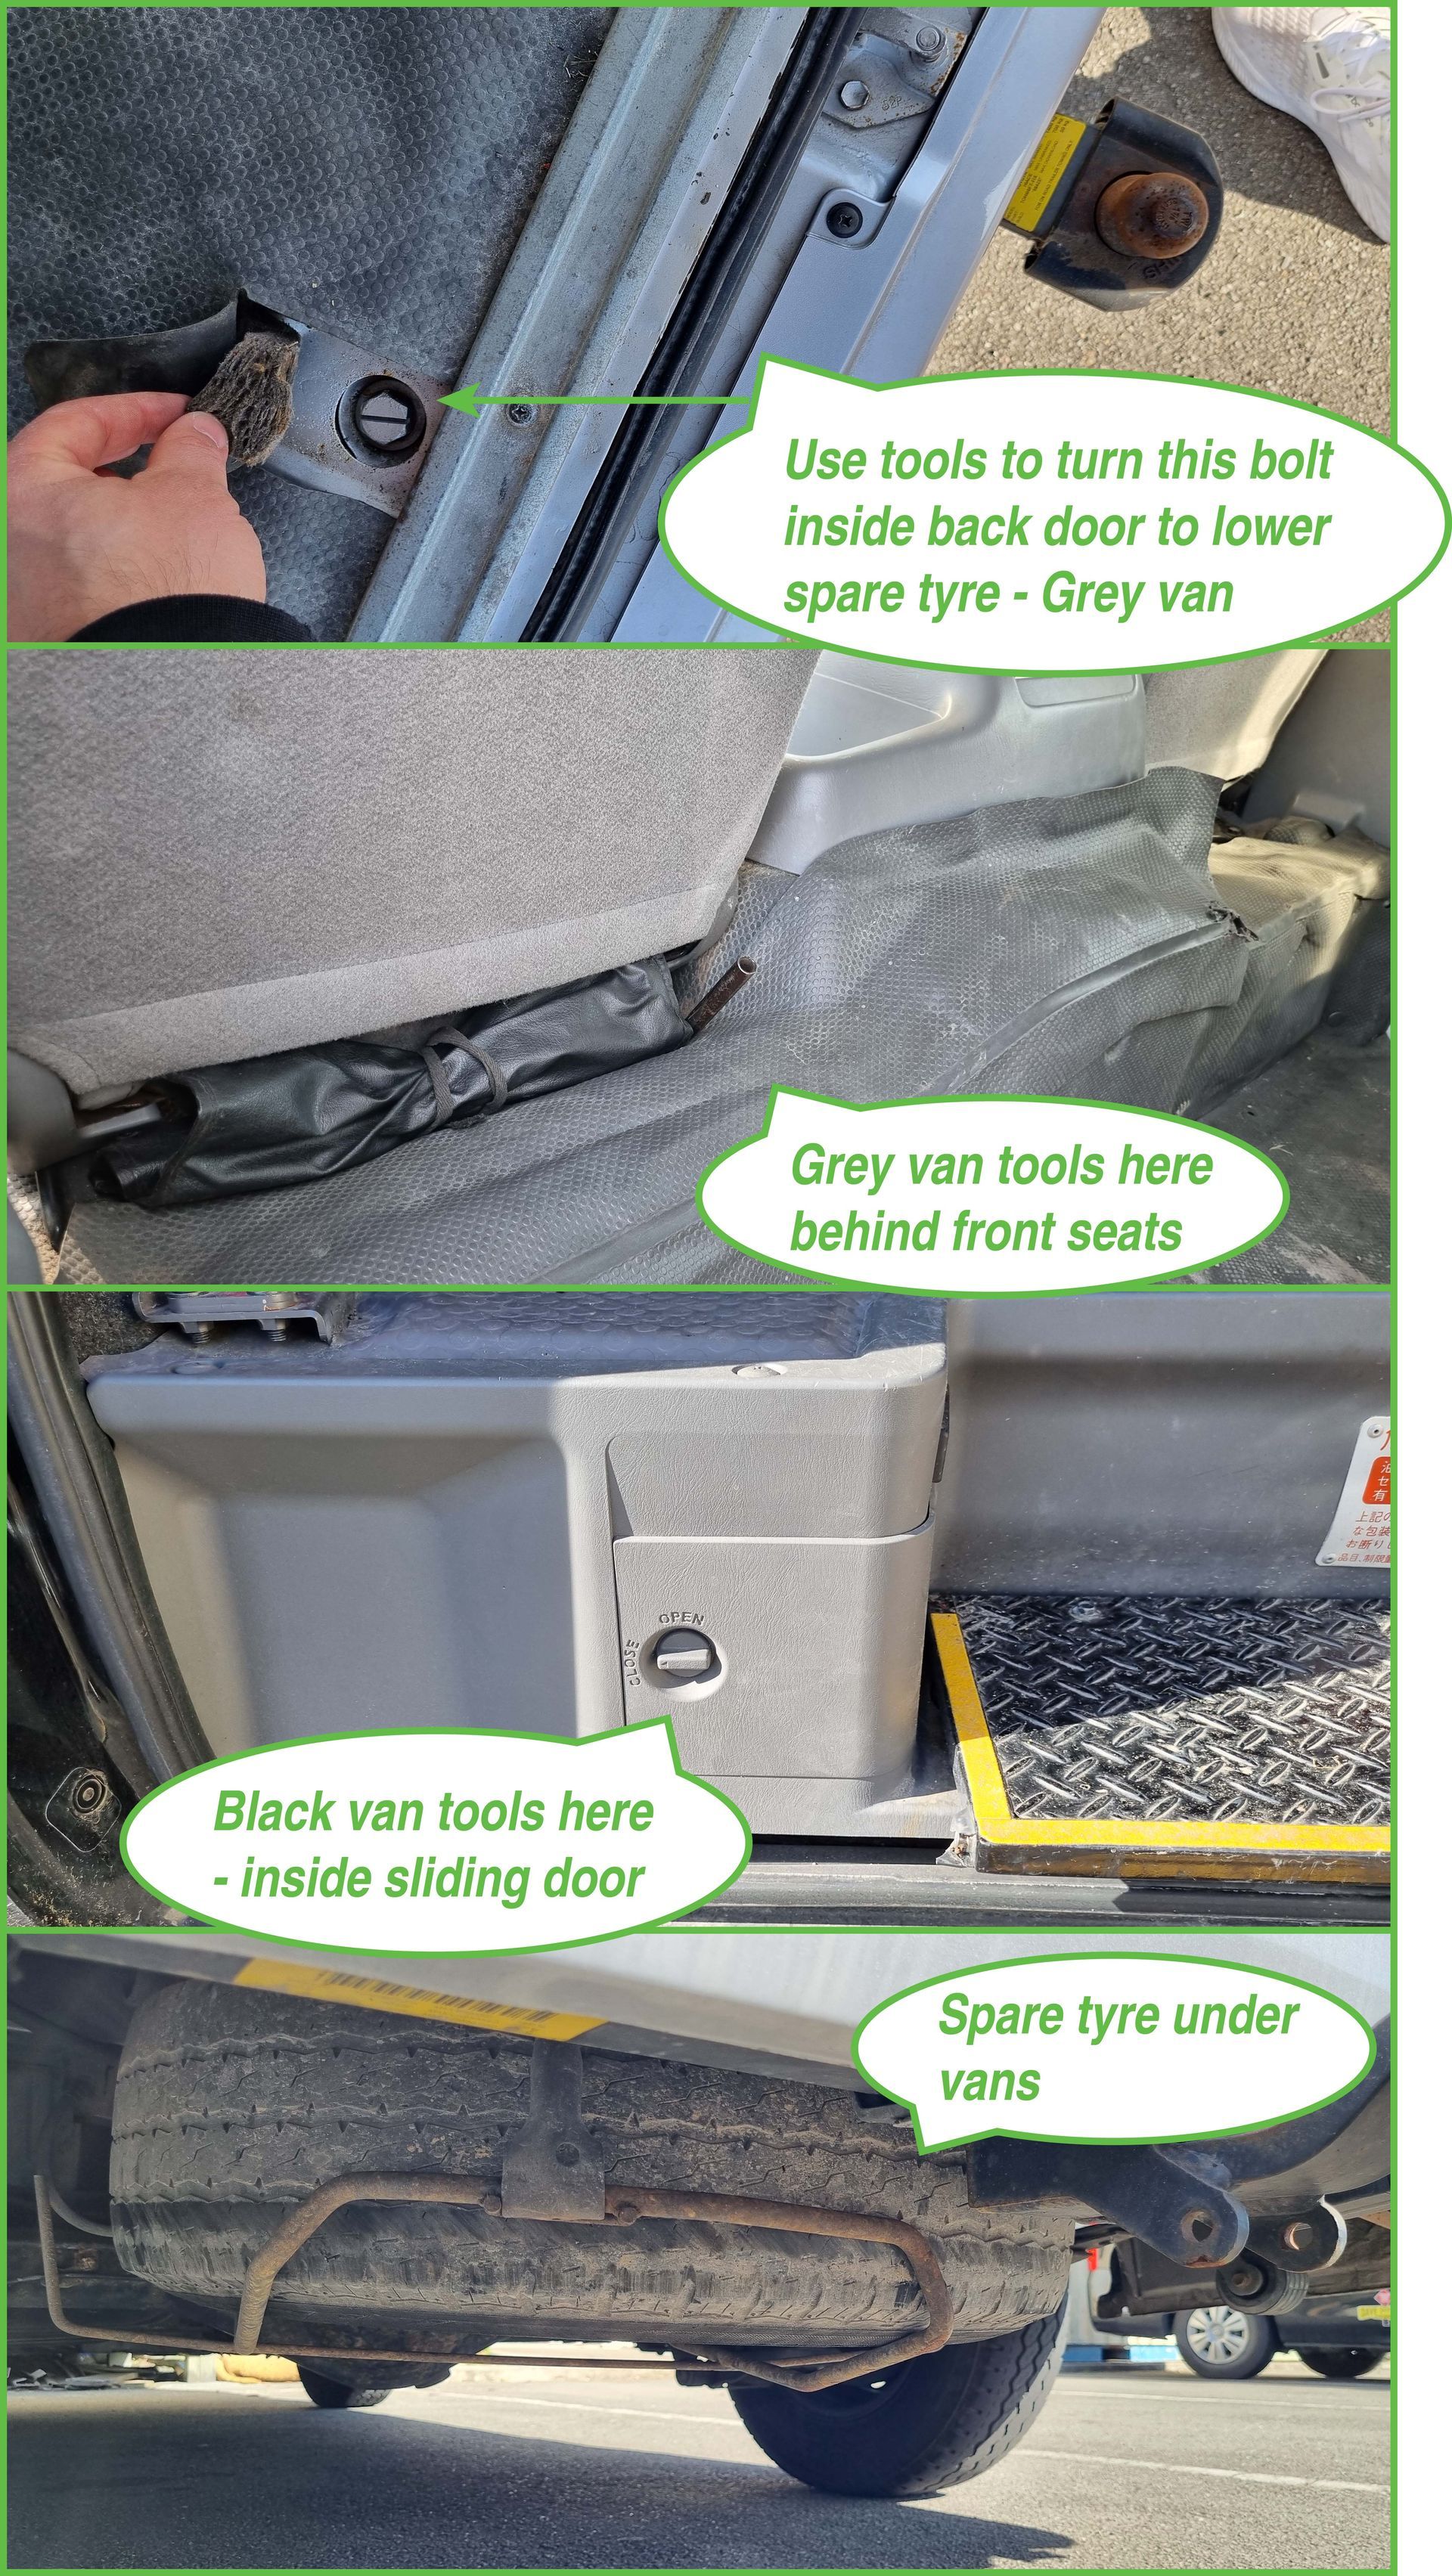
- Spare tyres are located under the back of the van.
- You will need to use the tool kit in the van to lower the tyre – see photo for tool kit location and location of screw to turn to lower the tyre.
Fuel
- Black Van takes DIESEL
- Grey Van takes 91 PETROL
- In each van (centre console) there is a fuel card to be used solely for fuel for the CDN vans. This can be used at any Caltex, Z, or Challenge station
- The code for the fuel card is 2368 (easy to remember as CDNT on a phone keypad)
How to clean / tidy the van
- Please remove ALL rubbish and belongings from the van after every use.
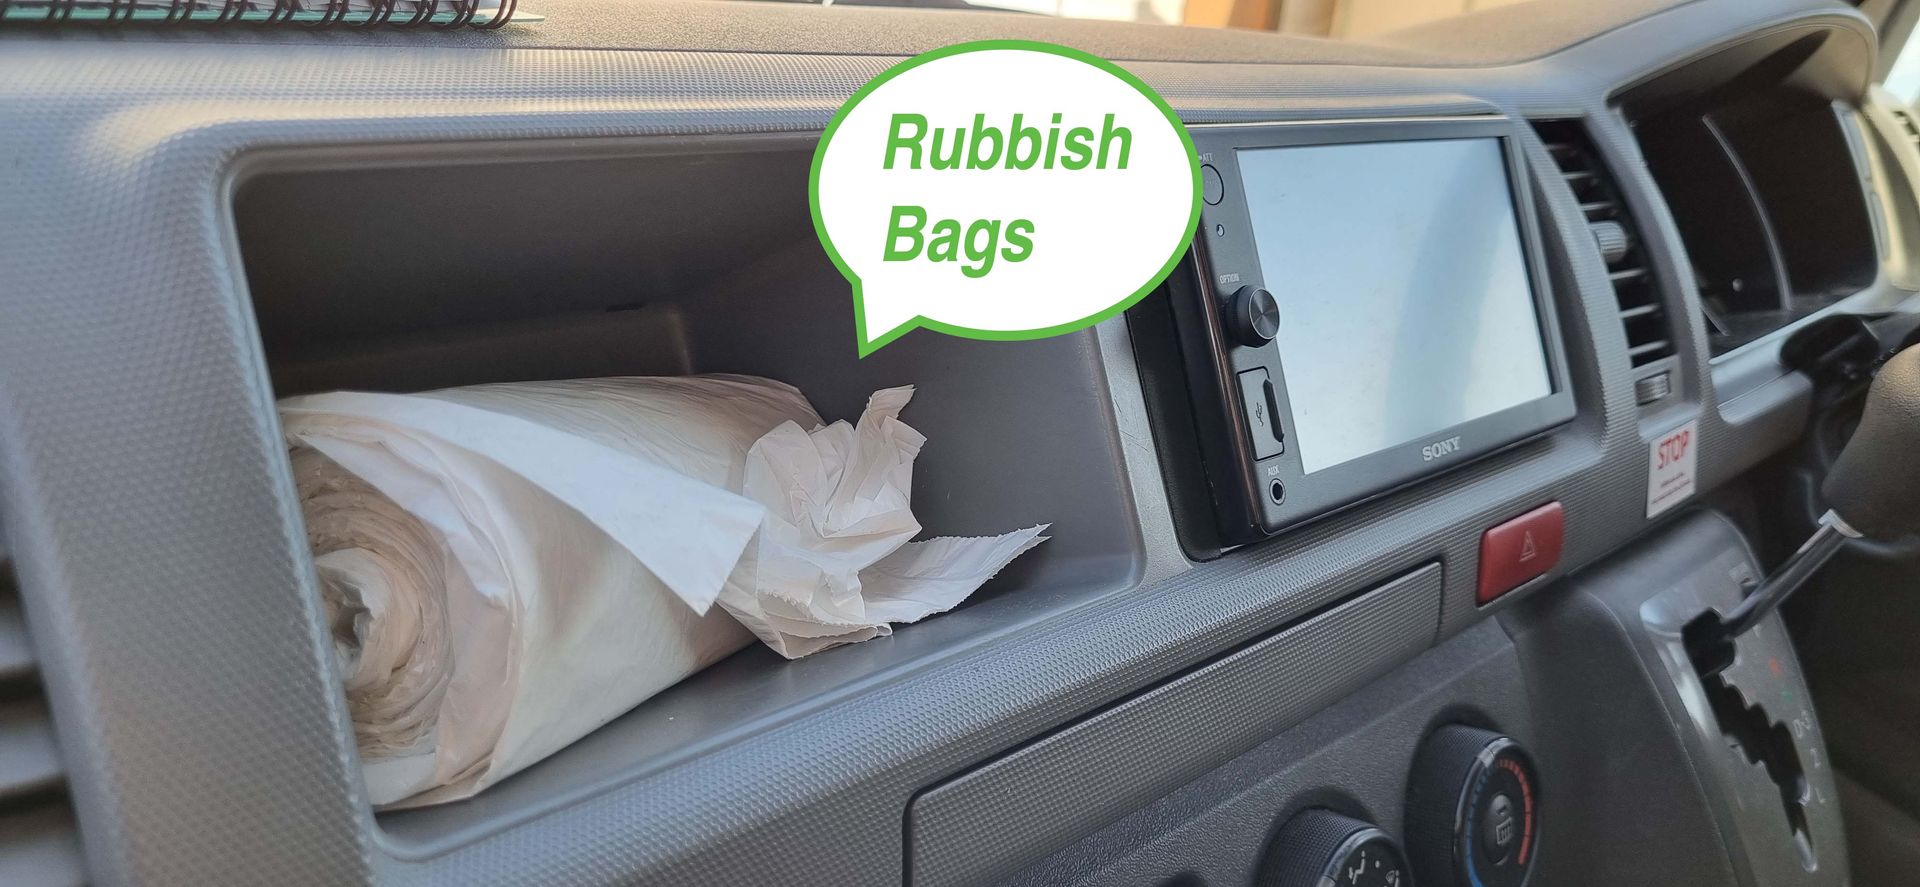
- There is a roll of small rubbish bags in the glovebox of each van for this purpose
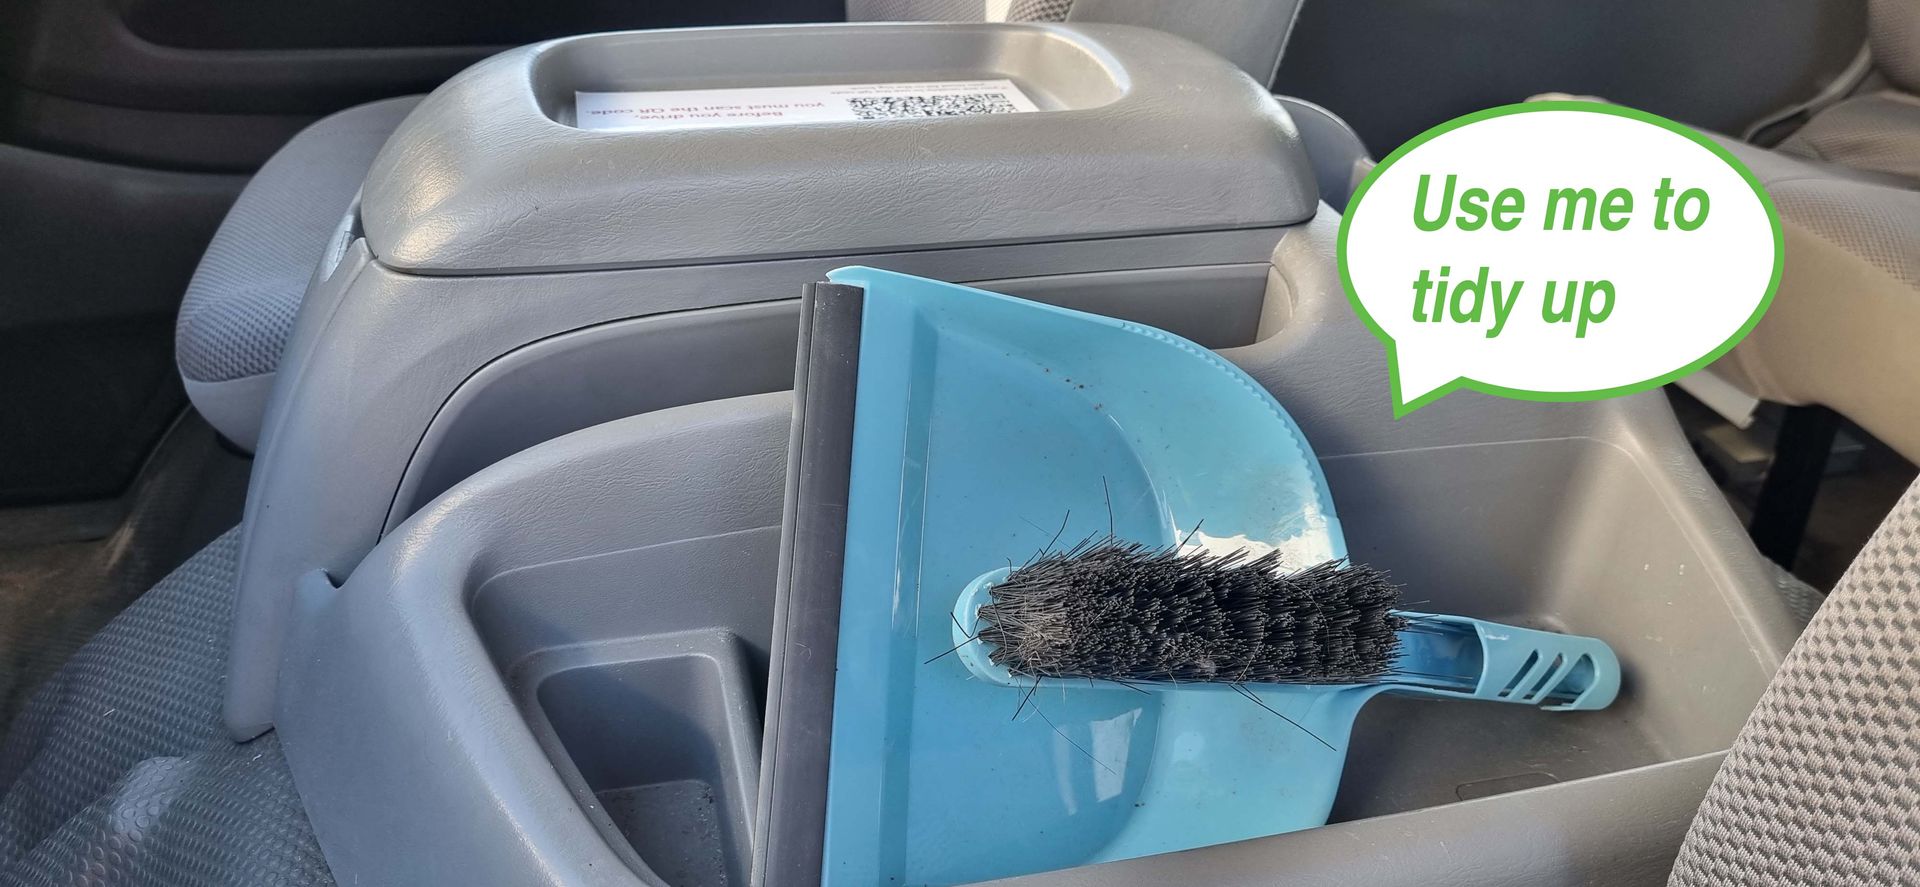
- If there is any dirt from shoes or food crumbs please use the broom & dustpan and tidy the van – front and back.
Jump starting the van – from another vehicle
- Photo of battery in van
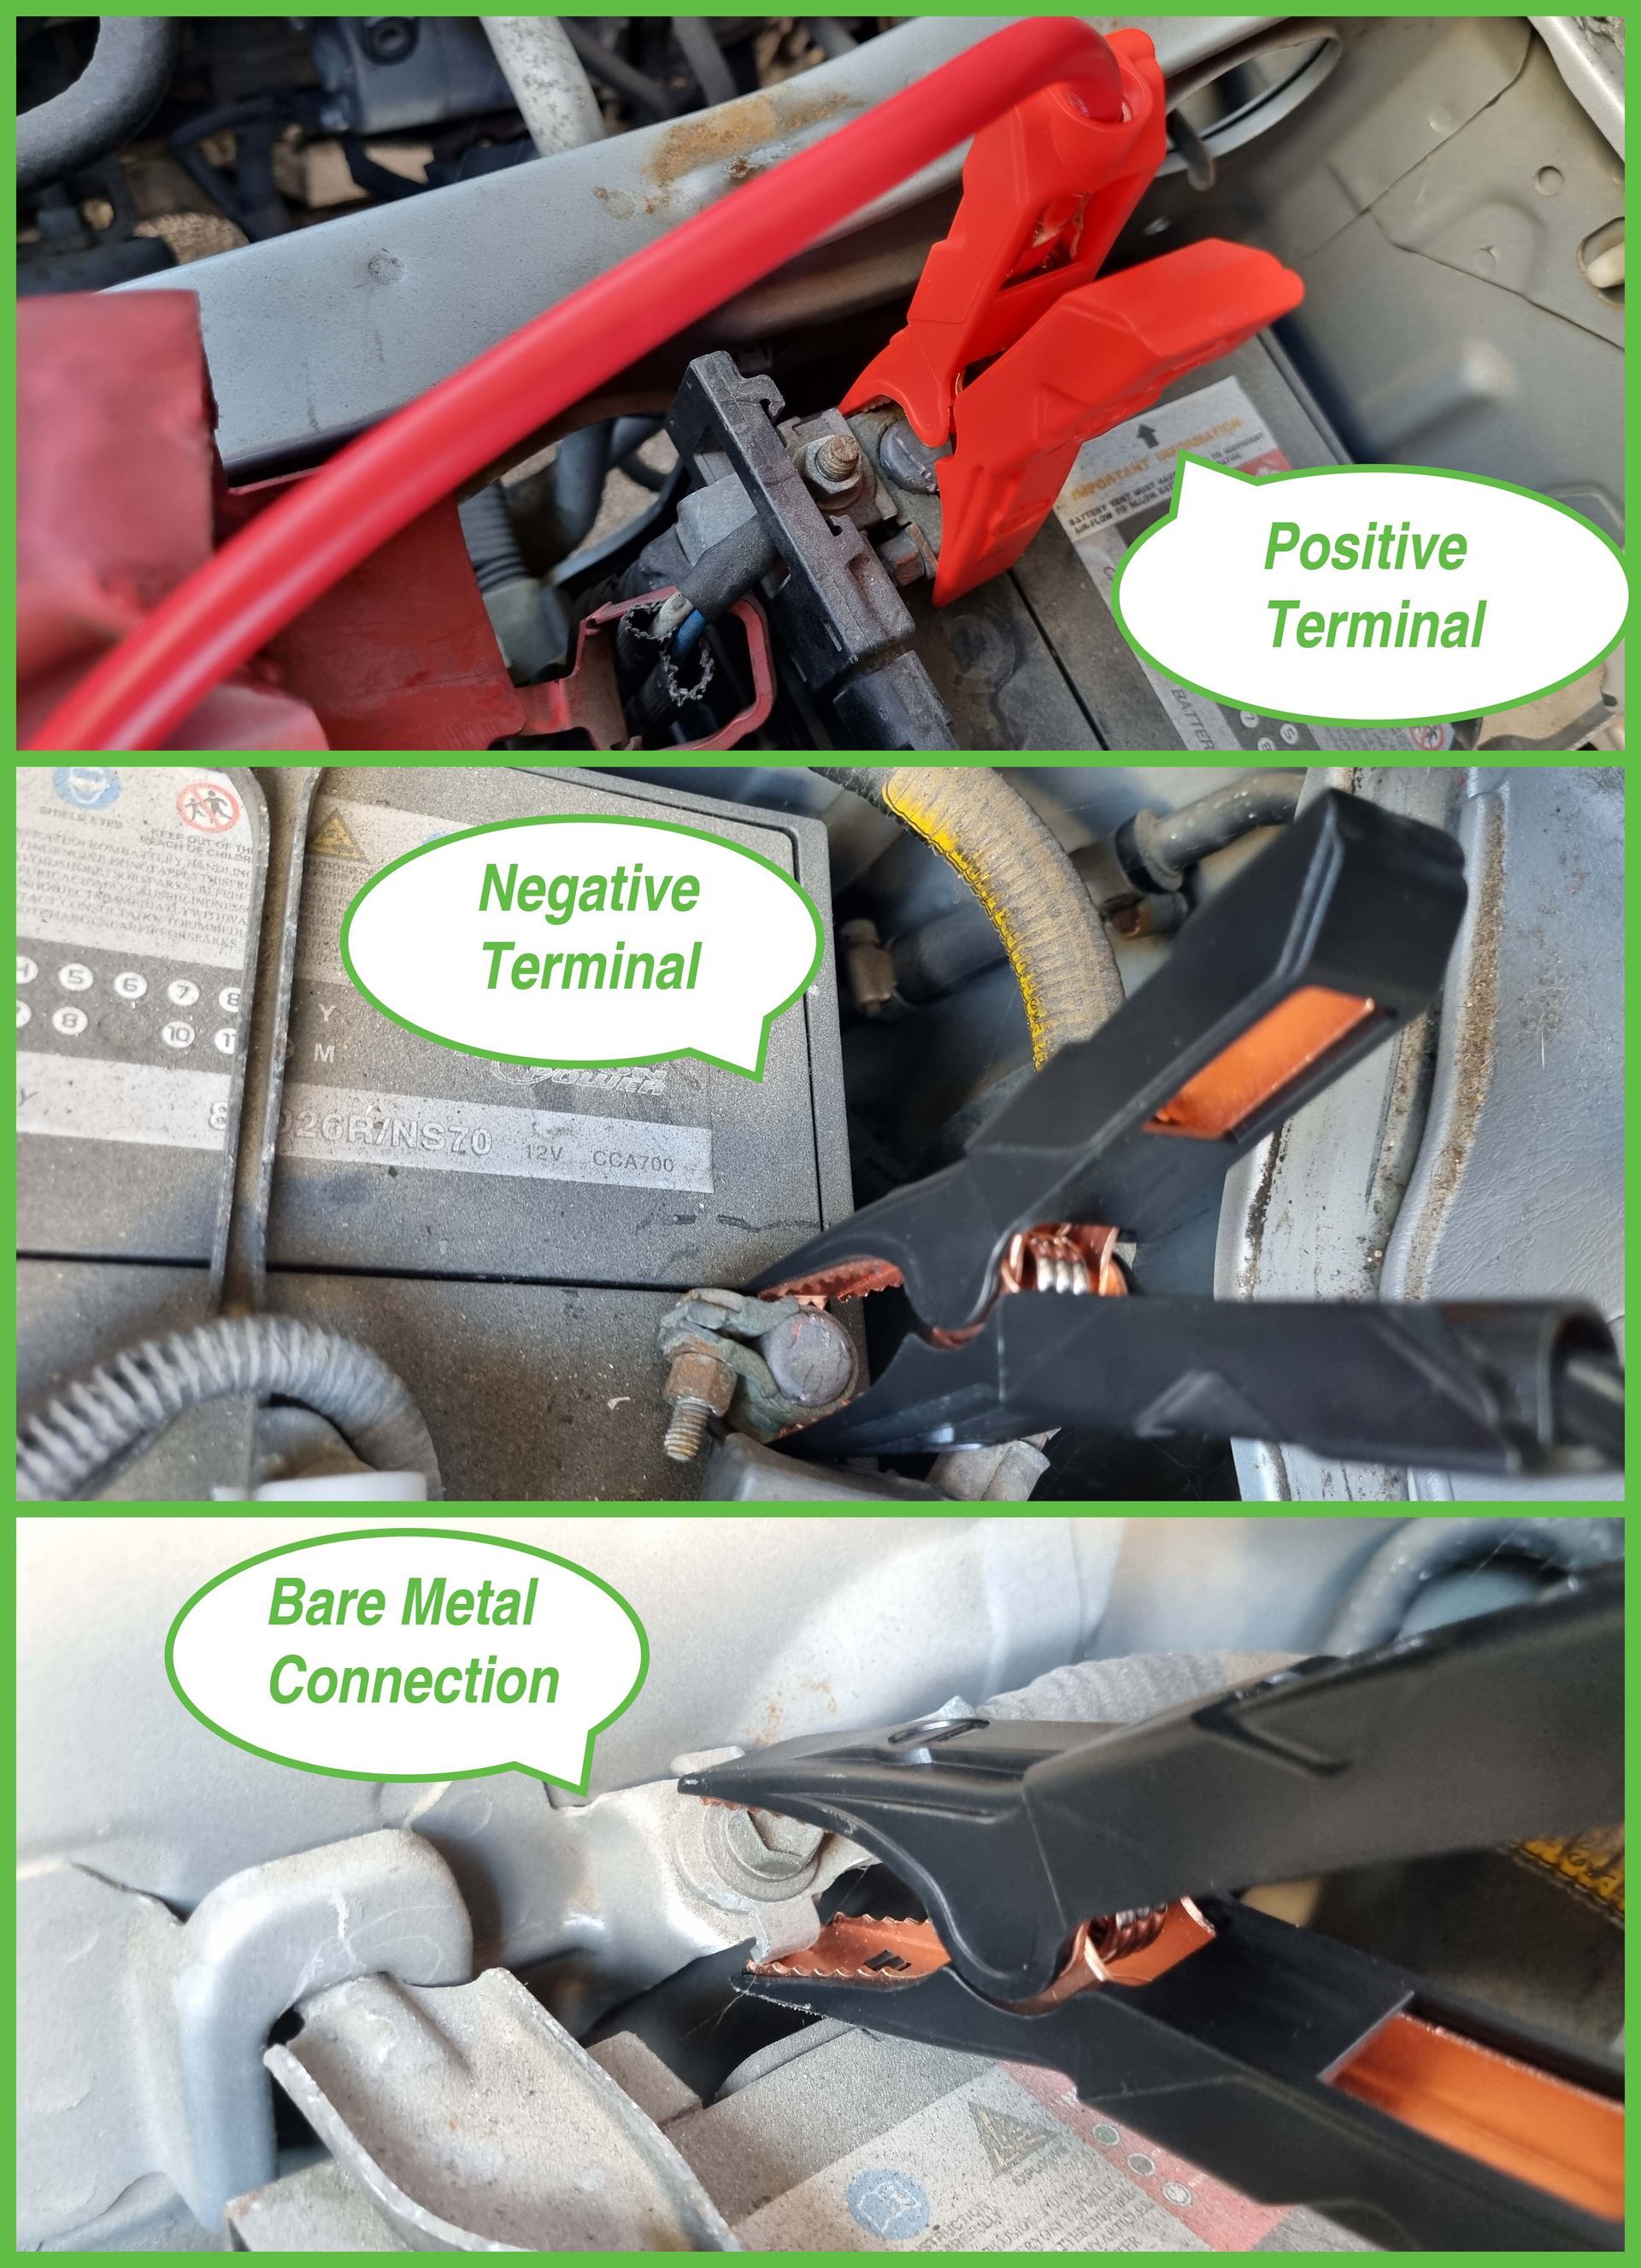
- Connect jumper cables as follows (Do not allow ends of cables to touch each other!)
- RED to DEAD: Connect the red clip to the positive terminal on your dead battery.
- RED to DONOR: Connect the other red clip to the positive(+) terminal on the donor vehicle's working battery.
- BLACK to DONOR: Connect the Black clip to the negative(-) terminal on the donor vehicle's working battery.
- BLACK to DEAD METAL: Back to the dead vehicle – connect the black clip to bare metal – ideally the chassis (PHOTO)
- Usually the battery will need to charge for a few minutes before it can start – this is especially true for the Black van.
- NOTE – as per starting instructions above: While you are getting all the cables in place, the immobiliser will probably kick in! You will probably have to press the “unlock” button on the key in order to disable the immobiliser immediately before trying to start the van.
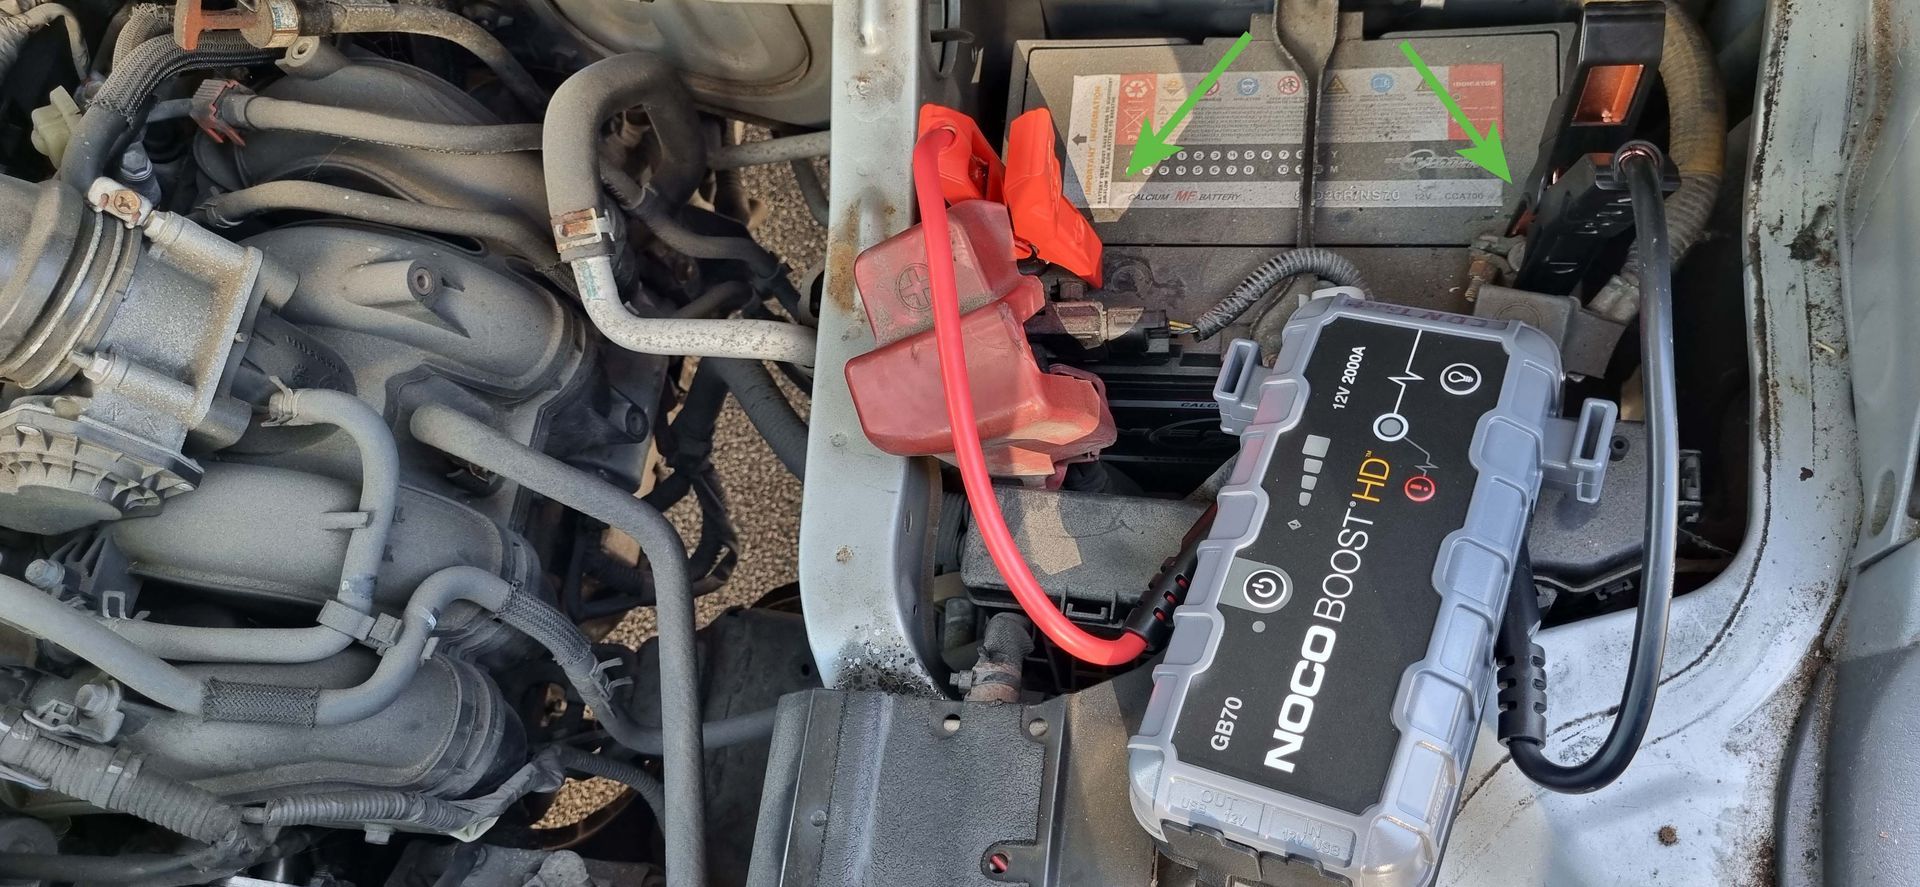
Jump starting the van – if using a Noco Boost battery pack
- Make sure all of the vehicle's power loads (headlights, radio, air conditioning, etc.) are turned off before attempting to jump start the vehicle.
- Connect Red lead to positive battery terminal
- Connect Black lead to negative battery terminal
- Press the Power Button to begin jump starting. All LEDs will flash, indicating that all LEDs are properly functioning. If you are properly connected to the battery, the White Boost LED will illuminate. If the battery clamps are connected in reverse, the Red Error LED will illuminate. Reverse the connections to clear this error and then the White Boost LED will illuminate. The White Boost LED is illuminated, when the Boost is ready to jump start your vehicle.
- Try starting the vehicle. Most vehicles will immediately start. Some vehicles may require Boost to be connected for up to 30 seconds before starting. If the vehicle does not start right away, wait 20-30 seconds and try again. Do not attempt more than five (5) consecutive jump starts within a fifteen (15) minute period. Allow Boost to rest for fifteen (15) minutes before attempting to jump start the vehicle again.
- Once you have started your vehicle, disconnect the battery clamps, and remove Boost.
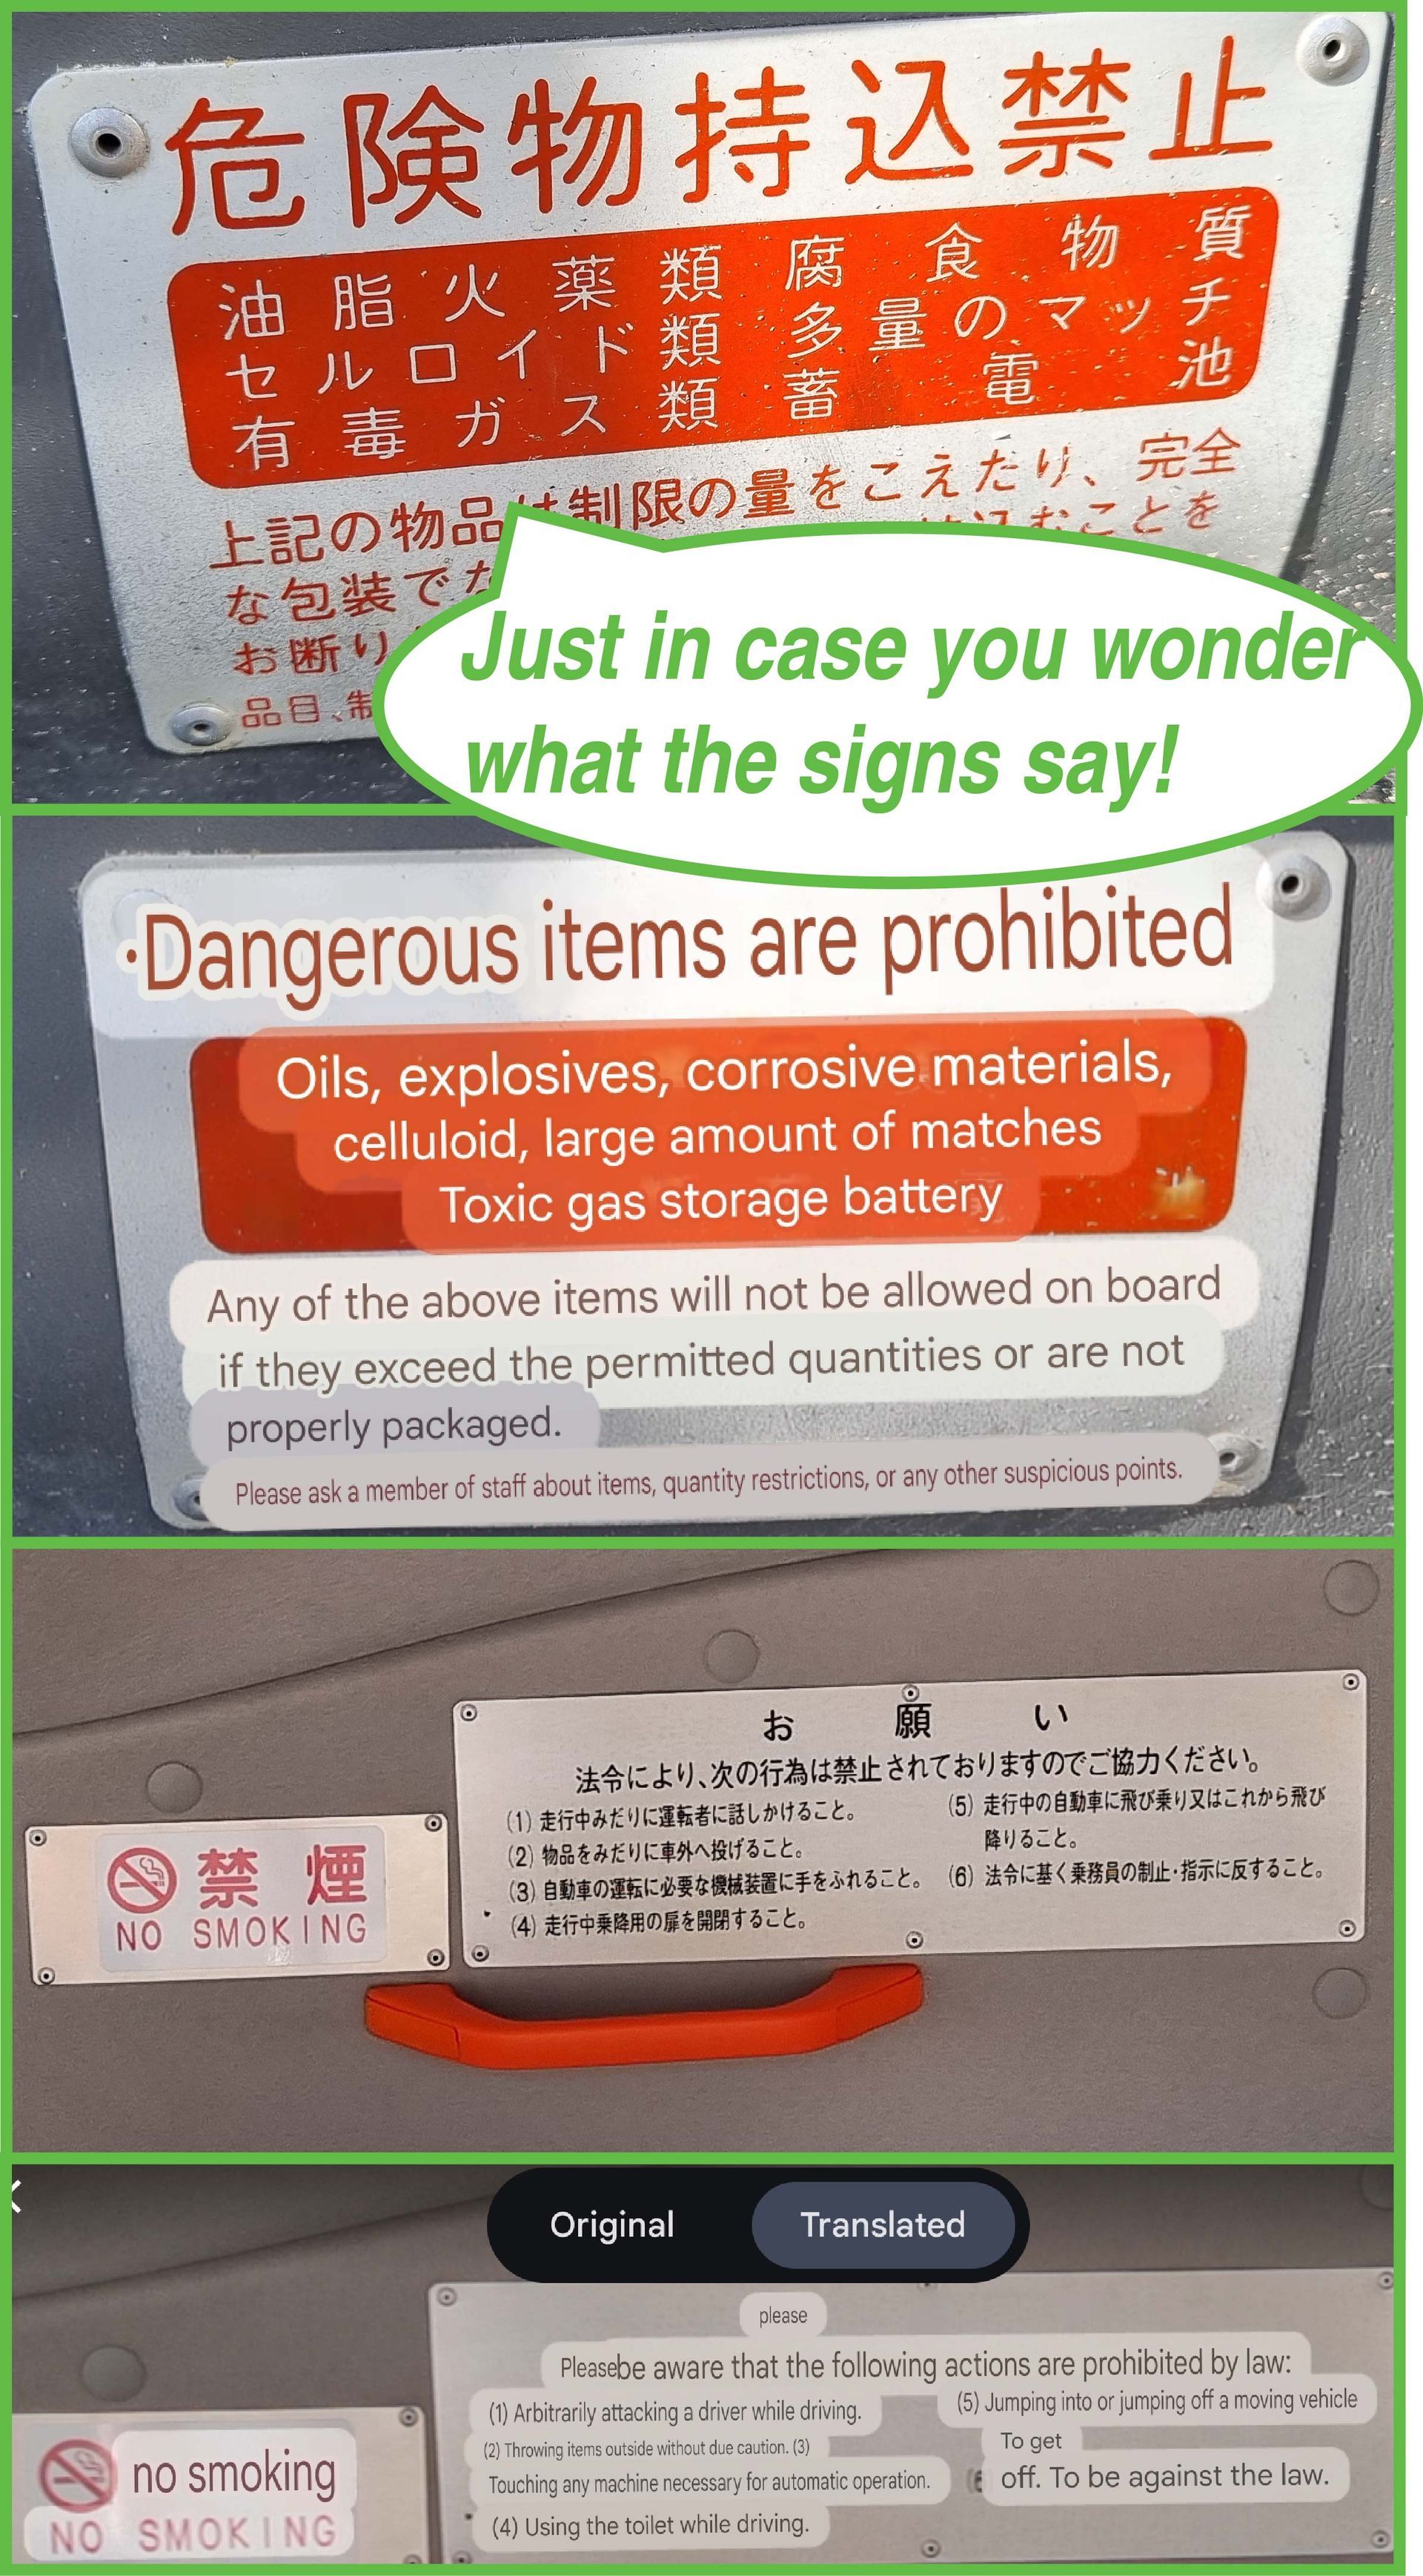
Black Van Signage
